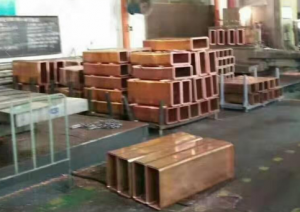
Ensuring Copper Mould Tubes Geometric Accuracy: Key Inspection Technologies & Production Significance

As highlighted in the previous article, the geometric accuracy of copper mould tubes is a make-or-break factor for continuous casting stability. To meet those strict "millimeter-level" standards, the steel industry relies on advanced inspection technologies—without which even well-designed tubes risk compromising billet quality. This article details these verification methods and summarizes why geometric accuracy remains indispensable to steel production.
I. Verifying Geometric Accuracy: Key Inspection Technologies
Three industry-proven methods ensure every copper mould tubes comply with accuracy requirements, leaving no room for hidden flaws:
1. Coordinate Measuring Machine (CMM): The "All-in-One Precision Inspector"
A CMM is the gold standard for measuring dimensional and geometric parameters, with an accuracy of up to 0.001 mm. During testing:
- The tube is secured on a stable platform to avoid vibration interference.
- A high-precision probe scans the tube’s axial and radial profiles, capturing thousands of data points (e.g., inner diameter, taper, straightness).
- An automated report flags any value outside tolerance—non-compliant tubes are immediately rejected, preventing substandard products from entering production.
This method eliminates human error and ensures consistency across batches, critical for large-scale steel mill operations.
2. Endoscopic Inspection: The "Inner Wall Detective"
To check for surface defects (e.g., scratches, inclusions) invisible to the naked eye, suppliers use optical or electronic endoscopes:
- The endoscope is inserted from the tube’s top to bottom, providing real-time visualization of the inner wall.
- Electronic endoscopes capture high-resolution images, allowing detailed analysis of roughness (e.g., verifying Ra ≤0.8 μm) and tiny defects (even 0.1 mm deep).
- Results are documented for traceability—if a billet defect later arises, technicians can cross-check the tube’s inspection records to identify root causes.
This non-destructive test ensures the inner wall’s integrity, a key barrier against steel adhesion and crack initiation.
3. Ultrasonic Thickness Testing: The "Uniformity Guardian"
Wall thickness uniformity (deviation ≤0.1 mm) is verified via **ultrasonic gauges**, which work by:
- Emitting high-frequency sound waves through the tube wall; the waves reflect off the inner wall and return to the gauge.
- Calculating thickness based on the time taken for waves to travel (thicker sections slow wave propagation).
- Testing at multiple points: circumferentially (every 90°) to check for radial unevenness, and axially (every 100 mm) to ensure lengthwise consistency.
Tubes with thickness deviations exceeding 0.1 mm are discarded immediately—this prevents localized cooling failures that cause billet cracks or breakouts.
II. Conclusion: Geometric Accuracy—The "Millimeter-Level" Backbone of Steel Production
Continuous casting is often called the "throat of steel production," and copper mould tubes are its "vocal cords." While geometric accuracy may seem like a minor "detail," its impact ripples through the entire production chain:
- For steel mills, accurate tubes reduce defect rates (cutting scrap costs) and minimize shutdowns (boosting operational efficiency).
- For suppliers, mastering accuracy control differentiates reliable partners from low-quality vendors—those who skip rigorous testing risk damaging their reputation and causing costly accidents for mills.
In essence, every "millimeter" of geometric accuracy represents a commitment to billet quality, worker safety, and production stability. As steel production demands higher efficiency (e.g., faster casting speeds) and better billet quality (e.g., for high-end steel grades), the focus on copper mould tubes geometric accuracy will only grow—solidifying its role as an "invisible guardian" of modern steelmaking.
Post time: Sep-05-2025